
How to Make Mummy Cookies (Free Halloween Printable)

These cookies are so much fun and they are really easy to make and you will love the cookie tags. You can also make these cookies into ghosts if you prefer, which I share how to do that in the video below.
Another perfect goody to pass out as treats in your little one’s class.
You Will Need:
- 1 pk of Milano cookies
- 15 oz pkg white chocolate candy
- candy eyes (or you can use candy buttons)
- parchment paper
- cookie sheet
- double boiler
- colorful ribbon
- 4×6 cello bags
- scissors
- 2 sheets of white cardstock
- 1 sheet of Halloween festive scrapbook paper
- hole punch
- 2 inch circle cutter
- 4 inch circle cutter
- glue pen
- free Mummy Cookie printable (printable at the end of the post)
SCROLL TO THE BOTTOM TO DOWNLOAD THE PRINTABLE COOKIE TAGS!
6 No Bake DIY Halloween Treats
Each of these snacks are easy to make and the kids will love them. The best part, no baking required!
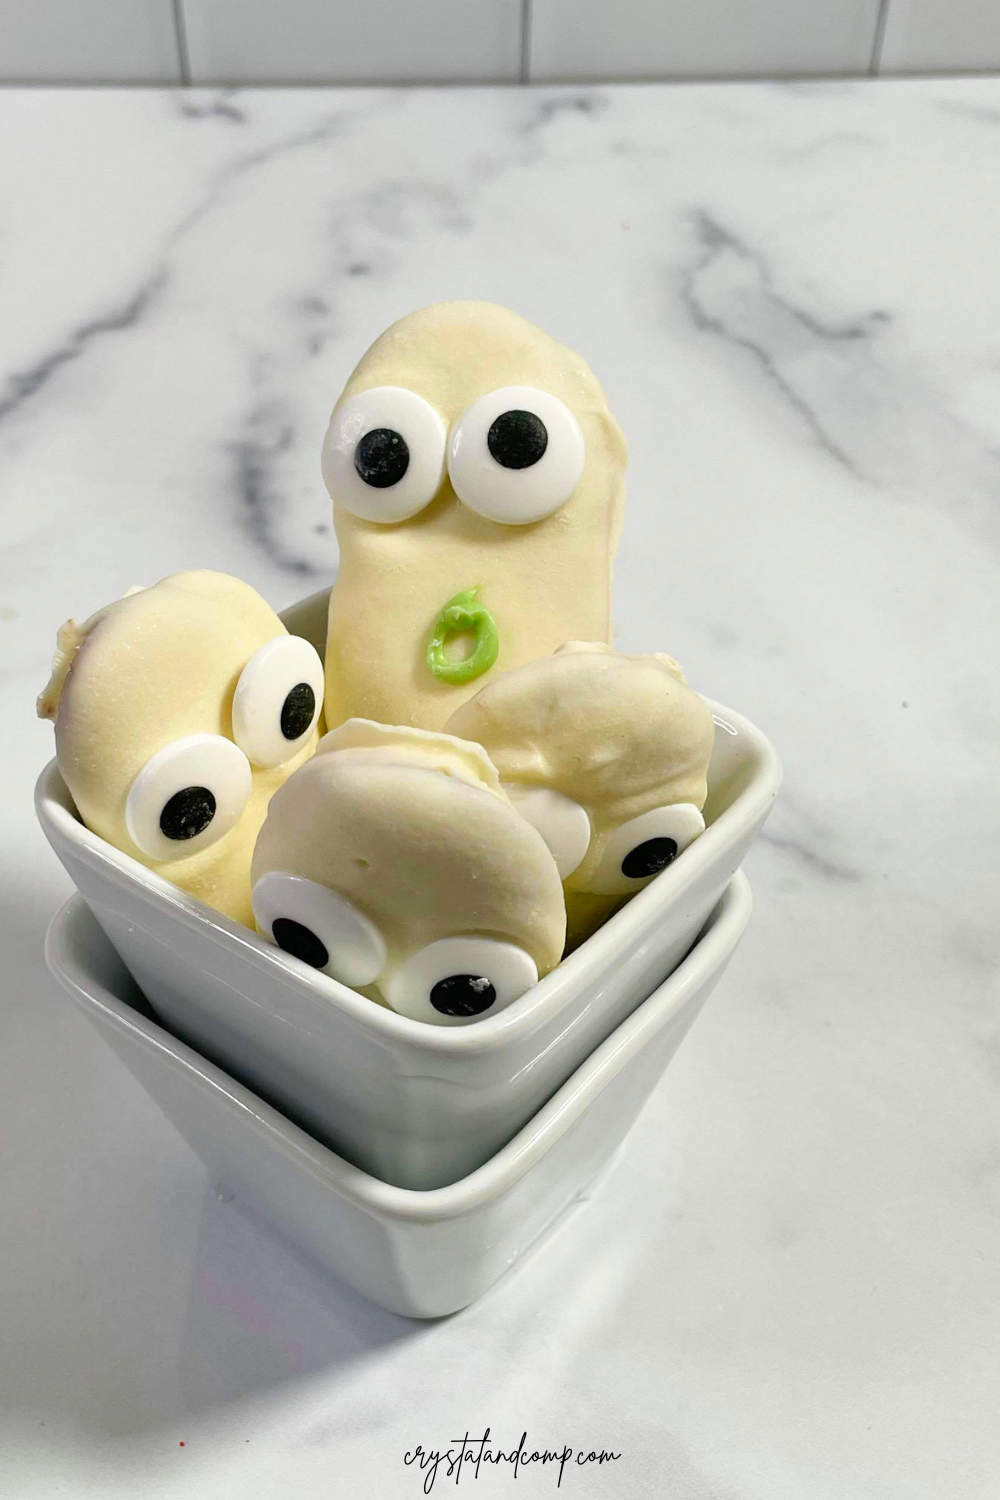
In this video we show you how to make ghosts with the Milano cookies instead of the mummies. Both are fun and equally as cute.
Melt your chocolate in a double boiler.

Dunk and coat your Milano cookies in the chocolate.
Be quick, the chocolate filling will start melting. Perfection is not important.
Place them on a parchment paper covered cookie sheet.
They do not have to be perfectly smooth. If the chocolate is not sticking where you were holding the cookie while dipping, just smooth it over with your finger to fill in the chocolate. Make sense?

Apply candy eyes while the chocolate is still melted.

You could also use candy buttons. You know, the colored little circles candies that come on a sheet and you can generally get them at the craft store.
Now, stick the cookie sheet in the fridge to harden the chocolate. About 30 minutes to an hour.

Once the chocolate on the cookies hardens, place some more melted chocolate in a ziplock bag.
Cut the corner of the bag with scissors to use the bag for piping chocolate onto the cookies.

Using a back and forth, left to right motion, apply strips of chocolate onto the cookies to represent a mummy wrapping.
Avoid the eye area if at all possible.

Pop them back in the fridge to let them cool again- about 30 minutes to an hour.
Once all of the chocolate is hardened again take them out of the fridge. Break off any extra chocolate that is hanging over the edges.

Grab your printable cookie tags that you printed out.

Use a 2 inch circle cutter to cut out the circles.
(Or, if you want to go with the non-fancy route, just cut the circles out with scissors.)

These little tools are really cool and easy to use.
I’ve purchased my cutters using half price coupons at the craft store- paying less than $10.

This is what they will look like once they are cut out.

Now, arrange the cut outs on a piece of festive scrapbook paper.
Glue them down with a glue pen or craft glue.

Next, use the 4 inch circle cutter to give your tag a two-tone effect.

This is what they will look like now.
Use a hole punch to place a hole near the top of each tag.

Place one cookie in each of the 4×6 cello bags.
Tie some festive colored ribbons around the cello bags.

Now, feed the ribbon through the hole you made in the cookie tag.
Knot it and tie.
Use some scissors to curl the ribbon.

And you’re all done.
How fun!
You could also make ghosts with the Milano’s instead of mummies. Here is what that would look like.

PRINTABLE MUMMY COOKIE TAGS

Crystal this is great! How cute 🙂 Thanks for sharing!!
These look deelish! And the photography on this post is stellar! I just want to stare at each picture! Love it!
These are absolutely adorable! Thanks so much!!!
Very cute!! Thanks for sharing on WFMW. 🙂
These are amazing Halloween giveaway! These mummy cookies look adorable and delicious! Thank you so much for sharing the recipe.
They are so adorable and very cute. They will make great treats for everyone!
Cute Cute CUte cookies! I’m hosting a Fabulous Fall party over at Not So Simple Housewife and I’d love for you to link this up! We are celebrating Fall and giving me and everybody else some great inspiration. We are looking for crafts, decor, food, and more! I’d love for you to add this and any other fall posts you may have!
Kaitlin-The Not So SImple Housewife
http://notsosimplehousewife.blogspot.com/2011/10/fabulous-fall-link-party.html
Crystal, what precious tags and great cookies! Thank you so much for sharing with Full Plate Thursday. Hope you are having a great week end and come back soon!
Miz Helen
Adorable! I love how you show every step.
Those are so CUTE! And the Milano with white chocolate sound good to eat, too. 🙂
What a fun idea! They turned out so perfect! Love the tags, too. Thanks for linking.
Congrats, Crystal! Your most was our #1 most clicked link last week in the Crafty Showcase. We are featuring you today on our blog. Stop back in on Saturday and share more of your awesome ideas in our Crafty Showcase.
http://bowdabrablog.com/2012/09/14/feature-friday-bowdabra-top-crafty-showcase-picks-14/#
Susie @Bowdabra
Wow, these are awesome! I hope you will link up to my Wickedly Creative Halloween Ideas Party if you haven’t already.
http://www.itsybitsypaperblog.com/2012/09/2012-wickedly-creative-halloween-ideas.html
Crystal, this is a great idea and something we can get started on right away. Hope you are having a great weekend and thank you so much for sharing with Full Plate Thursday.
Come Back Soon!
Miz Helen
The cookies look adorable and I love the design of the tag!
Thank you Karen. These were fun and easy to make.